Create private ethereum in Mac environment
21/04/18 09:07 Filed in: Blockchain
Using homebrew is easier to setup. To setup brew in your Mac try this https://brew.sh/
$brew update
$brew upgrade
$brew tap ethereum/ethereum
$brew install ethereum
For this setup I use ~/code/ethereum as my root directory for development setup. Create devethchain directory.
$mkdir devethchain
Create accounts
$geth --datadir ~/code/ethereum/devethchain account new

Create multiple accounts. After creating if you list files in keystore, you should see following files
$ls -l keystore

Get the account ID
In genesis file following values can be filled in
- chainId — chain’s identifier, is used in replay protection.
- homesteadBlock, eip155Block, eip158Block, byzantiumBlock — these relate to chain forking and versioning, for new blockchain leave them as 0 value.
This is to mine a block. Setting this value low (~10–10000) is helpful in a private blockchain as it lets you mine blocks quickly, which equals fast transactions, and plenty of ETH to test with. For comparison, the Ethereum mainnet Genesis file defines a difficulty of 17179869184.
This is the the total amount of gas that can be used in each block. With such a low mining difficulty, blocks will be moving pretty quick, but you should still set this value pretty high to avoid hitting the limit and slowing down your network.
Here you can allocate ETH to specific addresses you have created before. You will need to add the account to your private chain in order to use it, and to do that you need access to the keystore/utc file. The addresses provided are not real addresses, they are just examples. Here we allocate 100,000 and 120,000 ETH respectively.
$cd ~/code/ethereum/devethchain
$touch devgenesis.json
Add following into devgenesis.json file
{
"config": {
"chainId": 1966,
"homesteadBlock": 0,
"eip155Block": 0,
"eip158Block": 0,
"byzantiumBlock": 0
},
"difficulty": "400",
"gasLimit": "2000000",
"alloc": {
"b0f4aa6ba57c075f596af7e56d4c63ca986fc0e5": {
"balance": "100000000000000000000000"
},
"b2be78f4cac00988250aaaa1c7001e199b426c3b": {
"balance": "120000000000000000000000"
}
}
}
geth --datadir ~/code/ethereum/devethchain init ~/code/ethereum/devethchain/devgenesis.json

Start private chain
To keep private network you have to provide Networkid value. You can use any number here, I have used 196609, but other peers joining your network must use the same one.
geth --datadir ~/code/ethereum/devethchain --networkid 196609 console 2>> devethchain.log

Output should be like above. This is the geth JavaScript console. Any command with the symbol > should be typed here.
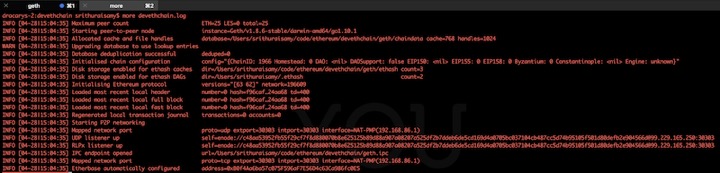
To view logs, open another terminal and tail the log file created after starting the private chain. The log file should be similar to below.
You can create new account in the java script console or import UTC file into keystone directory. I'm going to use one of account as default account created in genesis Gile.
Find default account, type the following command in javascript console.
>eth.coinbase
This will display first account in alloc. Incase if you want to change second one type following in javascript console.
>miner.setEtherbase(web3.eth.accounts[1])
To check the balance
>eth.getBalance(eth.coinbase)
To start the mining
>miner.start()
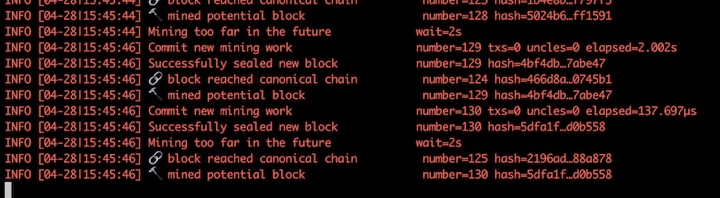
In the other terminal you can see the mining action in the log file as below.
If you want to stop mining
To get node info
>admin.nodeInfo.enode
You may see message similar to below with different address.
"enode://c48aa53952fb55f29cf7f8d880070b8e625125b89d88a907a08207a525df2b7ddeb6de5cd169d4a0705bc037104cb487cc5d74b95105f501d80defb2e904566d@[::]:30303"
This information you may need to add more peers
Install geth
$brew update
$brew upgrade
$brew tap ethereum/ethereum
$brew install ethereum
For this setup I use ~/code/ethereum as my root directory for development setup. Create devethchain directory.
$mkdir devethchain
Create accounts
$geth --datadir ~/code/ethereum/devethchain account new
Create multiple accounts. After creating if you list files in keystore, you should see following files
$ls -l keystore
Get the account ID
Create Genesis file
In genesis file following values can be filled in
config
- chainId — chain’s identifier, is used in replay protection.
- homesteadBlock, eip155Block, eip158Block, byzantiumBlock — these relate to chain forking and versioning, for new blockchain leave them as 0 value.
difficulty
This is to mine a block. Setting this value low (~10–10000) is helpful in a private blockchain as it lets you mine blocks quickly, which equals fast transactions, and plenty of ETH to test with. For comparison, the Ethereum mainnet Genesis file defines a difficulty of 17179869184.
gasLimit
This is the the total amount of gas that can be used in each block. With such a low mining difficulty, blocks will be moving pretty quick, but you should still set this value pretty high to avoid hitting the limit and slowing down your network.
alloc
Here you can allocate ETH to specific addresses you have created before. You will need to add the account to your private chain in order to use it, and to do that you need access to the keystore/utc file. The addresses provided are not real addresses, they are just examples. Here we allocate 100,000 and 120,000 ETH respectively.
$cd ~/code/ethereum/devethchain
$touch devgenesis.json
Add following into devgenesis.json file
{
"config": {
"chainId": 1966,
"homesteadBlock": 0,
"eip155Block": 0,
"eip158Block": 0,
"byzantiumBlock": 0
},
"difficulty": "400",
"gasLimit": "2000000",
"alloc": {
"b0f4aa6ba57c075f596af7e56d4c63ca986fc0e5": {
"balance": "100000000000000000000000"
},
"b2be78f4cac00988250aaaa1c7001e199b426c3b": {
"balance": "120000000000000000000000"
}
}
}
Initialize your node
geth --datadir ~/code/ethereum/devethchain init ~/code/ethereum/devethchain/devgenesis.json
Start private chain
To keep private network you have to provide Networkid value. You can use any number here, I have used 196609, but other peers joining your network must use the same one.
geth --datadir ~/code/ethereum/devethchain --networkid 196609 console 2>> devethchain.log
Output should be like above. This is the geth JavaScript console. Any command with the symbol > should be typed here.
To view logs, open another terminal and tail the log file created after starting the private chain. The log file should be similar to below.
You can create new account in the java script console or import UTC file into keystone directory. I'm going to use one of account as default account created in genesis Gile.
Find default account, type the following command in javascript console.
>eth.coinbase
This will display first account in alloc. Incase if you want to change second one type following in javascript console.
>miner.setEtherbase(web3.eth.accounts[1])
To check the balance
>eth.getBalance(eth.coinbase)
To start the mining
>miner.start()
In the other terminal you can see the mining action in the log file as below.
If you want to stop mining
To get node info
>admin.nodeInfo.enode
You may see message similar to below with different address.
"enode://c48aa53952fb55f29cf7f8d880070b8e625125b89d88a907a08207a525df2b7ddeb6de5cd169d4a0705bc037104cb487cc5d74b95105f501d80defb2e904566d@[::]:30303"
This information you may need to add more peers